Black Friday 3D Editable PSD Text Effect: Smart Design Choices for Better Marketing Graphics
Creating eye-catching promotional graphics for Black Friday often comes down to one thing: how quickly you can produce professional-looking text effects without starting from scratch. The Black Friday 3D Editable PSD Text Effect offers a practical shortcut, but using it effectively requires more than just opening the file and typing new words. Many designers, marketers, and business owners run into avoidable issues that waste time, reduce quality, or lead to disappointing results. Understanding how this tool actually works—and where people tend to go wrong—can save you frustration and help you produce polished marketing materials in less time.
What the Black Friday 3D Editable PSD Text Effect Actually Does
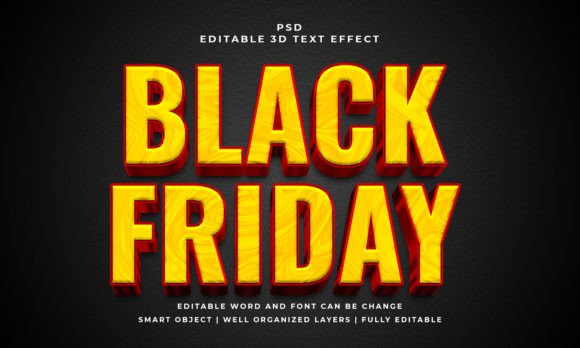
At its core, this PSD file is a pre-built template that generates a three-dimensional text effect suitable for Black Friday promotions, sales banners, social media posts, or email headers. The file comes with organized layers, RGB color mode, and a 2000x1200 pixel canvas. The key feature is the smart object: you double-click the layer, replace the placeholder text with your own, save, and the effect updates automatically. This works with text layers, vector shapes, or any kind of shape you place inside the smart object. The file includes a JPEG preview so you can see what you are getting before you start editing.
For someone who needs consistent, high-impact typography across multiple campaigns, this kind of template can be a genuine time-saver. But the difference between a result that looks custom and one that looks generic often comes down to small decisions made during editing.
Misunderstanding How Smart Objects Handle Content
The most frequent issue people encounter involves placing content inside the smart object without considering how it will be scaled or positioned. Smart objects preserve the original dimensions of whatever you insert. If you paste a large vector shape or a long headline into the smart object without resizing it first, the effect may crop oddly or lose its intended proportions. The template is designed to work with text, vector shapes, or any shape, but it assumes the content fits within the smart object boundaries.
What to do instead: Before you paste anything into the smart object, check its dimensions. If your text or shape is too wide, scale it down proportionally. Test the placement by viewing the main document after saving the smart object. If something looks off, reopen the smart object and adjust the position or size. This two-step check takes thirty seconds and prevents most layout surprises.
Overlooking Layer Organization and Naming
The file comes with well-organized layers, which is one of its listed features. Yet many users ignore the layer structure and start editing randomly. They duplicate layers they do not need, hide essential adjustment layers, or merge groups prematurely. Once the layer organization is disrupted, re-editing the file later becomes slower and more error-prone.
Why this matters for efficiency: If you plan to reuse this PSD for multiple Black Friday campaigns—different years, different offers, different product names—keeping the layer structure intact means you can swap text and colors in minutes. If you have flattened or rearranged layers, you lose that speed. The templates are designed with future edits in mind, so treat the layer panel as part of the tool, not as clutter.
Better approach: Before making any changes, take a moment to expand the layer groups and understand what each folder controls. Look for color adjustment layers, shadow effects, and the smart object itself. Work within the existing structure rather than creating new groups from scratch. If you need to duplicate the file for a different variation, use Save As rather than copying layers manually.
Ignoring the Font Limitation—and the Opportunity
The template is listed as supporting 100 editable text and font options, meaning you are not locked into a single typeface. But some users assume they can use any font installed on their system and that it will automatically look perfect with the 3D effect. In reality, the effect was built with certain font characteristics in mind—typically bold, wide, or sans-serif styles that hold their shape when extruded into three dimensions. Thin scripts or narrow serifs may not read well or may break apart visually.
The correction: Test your font choice inside the smart object before committing. Open the smart object, apply your font, and save to see how the 3D effect handles it. If the letters lose clarity or the depth effect looks uneven, choose a bolder weight or a different typeface. The 100 editable fonts included with the template are likely ones that work well with the effect, but you are free to use any font you own. Just verify the result before exporting final files.
Practical Checks Before You Buy or Download
Not all PSD text effect templates are created equal, and a few minutes of evaluation can prevent downloading a file that does not meet your needs. Here is what to verify before you commit to using this template for your Black Friday campaign.
- Resolution and canvas size: The file is 2000x1200 pixels at RGB color. This works well for social media graphics, blog headers, and email banners. If you need print-ready files at 300 DPI or larger dimensions, you may need to scale the effect, which can soften the 3D edges. Consider whether the output size matches your primary use case.
- Smart object behavior: Confirm that your version of Photoshop supports smart objects. Most modern versions do, but older or limited editions may not handle them properly. If you are using an alternative image editor, test whether it can read and edit PSD smart objects before relying on this template for a deadline.
- Layer naming clarity: Look at screenshots or previews of the layer panel if available. Clear, English-language layer names make editing faster. If the layers are labeled in a language you do not understand or are numbered ambiguously, expect a steeper learning curve.
- Preview file: The inclusion of a JPEG preview is a small detail, but it tells you the creator expects you to check the result before distributing it. Always open the preview to see the default look, then compare it to your edited version to catch any color shifts or alignment changes.
Using the Template for More Than Just Text
One of the more flexible features of this PSD effect is that it works with vector shapes or any kind of shape, not only text. Many users overlook this capability and limit themselves to typography. If you need a 3D logo treatment, a promotional icon, or a custom shape that carries the same dimensional style, you can place a vector shape into the smart object and get the same extruded effect.
Practical example: Suppose you are designing a banner that includes a percentage-off graphic, such as "40% OFF." Instead of typing that as text, you could create a vector shape of the number and percentage sign, place it in the smart object, and apply the 3D effect. The result looks cohesive with your headline text and extends the visual theme without requiring manual 3D rendering.
Just remember that vector shapes with very thin strokes or intricate details may not translate well into the 3D effect. Test a simple version first, then increase complexity gradually.
Color Choices and Brand Consistency
The template uses RGB color mode, which is standard for digital screens. If your Black Friday graphics need to match brand colors exactly, you will need to adjust the effect layers to your specific hex or RGB values. Some users assume the default colors in the template are fixed, but the well-organized layers make it straightforward to modify color overlays, gradients, or shadow tones.
Common oversight: People edit the text inside the smart object but forget to update the color treatment layers outside it. The result is mismatched colors between the text itself and the surrounding effect. To avoid this, check every layer group that affects color: gradient fills, color overlays, and drop shadows. Adjust them all to your brand palette rather than leaving some layers at default values.
If you plan to use this template for multiple products or offers within the same campaign, create a color preset or swatch group beforehand. This keeps every variation visually consistent and saves you from re-entering color values each time.
Why Layer Organization Matters for Reuse
The template advertises well-organized layers as a feature, and it truly is one of the most valuable aspects of a good PSD file. When layers are labeled clearly and grouped logically, you can edit a file months later without having to relearn its structure. For entrepreneurs, bloggers, and small business owners who run Black Friday promotions year after year, being able to open a previous year's file, update the text and offer details, and export new graphics in under fifteen minutes is a significant efficiency gain.
What erodes that efficiency: Adding new layers without naming them, merging groups out of habit, or deleting adjustment layers that you think are unnecessary. Each of these actions makes the file harder to reuse. If you need to create a variation, duplicate the entire PSD file and work on the copy, leaving the original intact as a fresh template for future edits.
Working Within the 2000x1200 Canvas
The fixed canvas size means you should plan your layout around that aspect ratio. Some users try to stretch the effect to fit a wider or taller canvas, which degrades the 3D rendering. Instead of scaling the PSD file itself, design your final composition within the given dimensions. If you need a different aspect ratio for a specific platform, create a new document at that size and composite the 3D text effect into it as a smart object or rasterized layer.
This approach preserves the quality of the 3D effect and gives you more control over the surrounding design elements. The JPEG preview included in the file gives you a reference point for how the effect should look at its native size—use that as your quality benchmark.
Making the Most of the 100 Editable Fonts
The claim of 100 editable text and font options often gets misinterpreted. It does not mean the template includes 100 font files. It means the smart object accepts any font you have installed, and the effect works with a wide range of typefaces. The number reflects flexibility, not a pre-loaded library. If you are expecting to find 100 fonts included in the download, check the product description carefully. Most likely, you will use fonts you already own or license separately.
To get the best results, choose fonts that are bold, have consistent stroke widths, and maintain legibility when given depth. Avoid overly decorative or script fonts unless you test them thoroughly. The 3D effect adds visual weight, so a font that looks balanced in 2D may appear heavy or distorted when extruded.
Final Considerations Before You Start
Using the Black Friday 3D Editable PSD Text Effect effectively comes down to understanding its smart object workflow, respecting the layer organization, and testing your choices before finalizing. The template is designed to save time, but it rewards users who take a few minutes to verify their edits along the way.
Whether you are a freelancer preparing graphics for multiple clients, a marketer building a campaign, or a small business owner handling your own promotions, this tool can deliver consistent 3D typography without requiring advanced rendering skills. Just avoid the common shortcuts—skipping the smart object check, ignoring layer names, or assuming any font will work—and you will get results that look intentional and polished.
Keep the original PSD file as your master template, make copies for each variation, and test your text and shape content inside the smart object before committing. That simple habit alone will eliminate most of the frustration people experience with editable PSD effects and leave you with graphics that stand out during one of the busiest shopping seasons of the year.