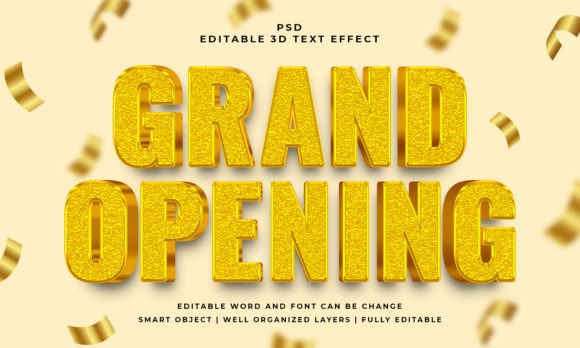
Grand Opening 3D Editable Text Effect: A Practical Guide to Getting It Right
When you’re launching a business, opening a new location, or running a promotional campaign, the first impression matters. That’s where a polished visual like the Grand Opening 3D Editable Text Effect can make a difference. It offers a ready-made design that lets you replace the text inside a smart object, adjust the font, and keep the three-dimensional look without starting from scratch. But even with a well-intentioned template, there are common missteps that can turn what should be a quick win into a frustrating experience. Understanding these pitfalls beforehand helps you avoid wasted time, poor output, and unnecessary costs.
The core appeal of this effect is its simplicity. You open the PSD file, find the smart object layer, double-click it, edit the text or shape, save, and return to the main file. The 3D rendering, lighting, and depth are already applied. For anyone from a blogger to a small business owner, this workflow removes the need for specialized 3D software. However, the ease of use can lead to a few overlooked details that affect the final result. Let’s walk through the most common mistakes and how to steer around them.
Overlooking Layer Organization Before Editing
A typical PSD file for a text effect comes with many layers: background, shadows, highlights, reflection, and the smart object itself. Beginners sometimes start typing directly onto the canvas without locating the smart object, which overwrites the effect or distorts the layout. Even experienced users might rush past the folder structure, assuming all layers are self-explanatory. When you ignore how the file is organized, you risk breaking the link between the 3D style and your text.
The better approach is to take two minutes to open the Layers panel and look for the layer named something like “Edit Text” or “Your Text Here.” If you see a small icon indicating a smart object, that’s your target. Right-click and choose “Edit Contents” (or double-click the thumbnail). Inside the new window, you’ll see a simple canvas with your placeholder. Replace it with your own text, and then save and close. That’s the only place you should edit. Everything else stays untouched. This small habit protects the integrity of the 3D effect.
If the file claims it works with vector shapes, check whether there is a specific shape layer inside the smart object too. Some templates expect you to paste a shape as a vector smart object; otherwise, the depth effect may not map correctly. Reading the included instructions or the JPEG preview can save you from having to redo the work.
Assuming Any Font Will Work Without Testing
The template description often says “100% editable text and font,” which is true—you can change the typeface. But if you use a font that is not installed on your system, your text will revert to a default or missing font. The 3D geometry is built around the original font’s metrics; substituting with a radically different width or height can cause overlapping shadows or clipped edges. I’ve seen cases where a narrow font looked fine, but a wide display font pushed parts of the 3D extrusion outside the intended bounding box.
The fix is straightforward: always test your chosen font inside the smart object before finalizing. Use a font with similar proportions to the one shown in the preview if you want the same look. If you must use a custom font, check that the file’s canvas is large enough to accommodate the longest word. The template typically offers a 2000×1200 pixel canvas, which gives you breathing room, but extremely large ascenders or descenders might still get cut off. Also, keep in mind that free fonts may lack bold or italic variants, which can break the 3D effect if the style requires a specific weight.
Ignoring the RGB Color Mode Requirement
The product description specifies RGB Color. That matters more than you might think. Many users work in CMYK for print, and then try to open the PSD only to find the colors look dull or mismatched. Some mistakenly convert the file to CMYK after editing, which flattens the vibrant 3D highlights and makes the shadows muddy. The template was designed in RGB to take advantage of screen brightness and blending modes.
If your final use is digital—social media, website banners, email headers—working in RGB is ideal. If you need to print, it’s better to keep a master RGB copy and convert only a flattened version to CMYK at the end, adjusting the levels if necessary. But never convert the original PSD, because the smart object and layer styles rely on RGB blending. The result will look flat and lose the dimensionality that makes the effect appealing.
Misunderstanding the “Works with Shapes” Feature
The file says it works with text, vector shapes, or any kind of shape. That is a powerful option if you want to create a logo, icon, or custom symbol inside the 3D effect. However, the mistake here is to use a rasterized shape or a low-resolution PNG and expect it to behave like a vector. The smart object expects a vector path or a high-resolution shape to maintain crisp edges during the 3D extrude. If you paste a pixel-based image, the effect will look jagged or blurry.
To avoid this, create your shape in Illustrator or using Photoshop’s shape tools, then copy it as a vector smart object into the smart object layer. If you don’t have a vector version, use a high-resolution raster image (at least 2000×1200) and convert it to a smart object before pasting. Test the result at 100% zoom to confirm edges remain smooth. Many users skip this test and later wonder why the effect looks amateurish.
Neglecting to Check the JPEG Preview for Clarity
Included with the PSD is a JPEG preview. Some people ignore it or delete it immediately. That preview is actually a useful reference. It shows the intended colors, lighting direction, shadow placement, and overall mood. When you start editing, you can compare your version to the preview to see if the effect is aligning correctly. For example, if your text appears too dark or the shadows look displaced, a quick glance at the preview helps you pinpoint the issue—maybe you moved the background layer, or the smart object’s content shifted position.
Keep the JPEG in the same folder as the PSD. If you share the file with a client or team member, include the preview so they understand what the final effect should resemble. It’s a small step that prevents miscommunication and wasted revisions.
Relying on Default Settings Without Adjusting the Composition
The template comes pre-built with a 2000×1200 pixel canvas. That’s a common size, but it may not match your project’s aspect ratio. Some users try to scale the entire effect to fit a square or a vertical banner, which distorts the 3D perspective. The extruded text becomes stretched or compressed, ruining the illusion of depth.
A better approach is to resize the canvas before editing the text. In the main PSD, go to Image > Canvas Size to add space around the effect, or trim it down. Do not scale the layers; instead, reposition the smart object group so the text stays centered with enough padding. If you need a completely different dimension, consider purchasing a template that matches your target size, or create your own custom background. Trying to force a square peg into a round hole rarely looks professional.
Forgetting to Review the Cost vs. Value
Some beginners assume any free template will do the job. While there are free 3D text effects available, many come with limited font options, no smart object structure, or low resolution. The Grand Opening 3D Editable Text Effect is a commercial product that typically includes a well-organized PSD, a preview, and support for shapes and text. When you download a free alternative, you often lose the ability to edit fonts, or the layers are flattened, giving you no control at all. A small upfront investment saves hours of frustration.
On the other hand, some users buy multiple similar effects expecting each to offer unique value but then only use one. Before purchasing, examine the preview: does the lighting style match your brand? Are the colors and materials appropriate for your industry? If the effect is overly shiny and you need a matte look, consider whether a simple color overlay will bring you close enough. Asking these questions beforehand prevents buyer’s remorse and ensures you get exactly what you need.
What to Check Before You Download and Use
Before you commit to any PSD effect, verify the following:
- Software version: The PSD works in Photoshop CC or newer. Older versions may not support smart objects properly.
- Layer naming: Look at the seller’s screenshots to confirm the layer names are in your language and understandable.
- Font licensing: The effect often uses a specific font for the preview, but that font may not be included. Have a similar alternative ready.
- Support policy: If you get stuck, does the seller offer email or chat help? This matters for first-time users.
- Sample output quality: Zoom into the preview to see if the 3D extrusion has aliasing or noise.
Taking these five minutes before purchasing will save you from downloading a file that doesn’t match your workflow. It also sets realistic expectations—no template will perfectly match every idea, but a good one gives you a solid foundation to build upon.
The Grand Opening 3D Editable Text Effect is a practical tool for anyone who needs a quick, professional-looking announcement. It reduces the learning curve for 3D typography and gives you a head start on design. But like any tool, its success depends on how you use it. By respecting the smart object workflow, testing fonts, staying in RGB, and checking the preview, you’ll avoid the common mistakes that turn a simple edit into a headache. Approach it with the same care you would a custom design, and the result will serve your project well—whether you’re a freelancer preparing a client proposal, a marketer creating a social media campaign, or a small business owner announcing a grand opening.